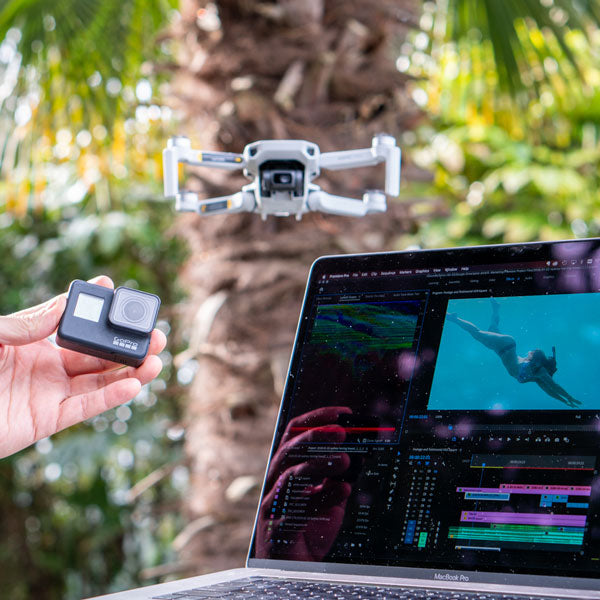
Today we’re talking about GoPro Protune. This little known extra settings mode on GoPro cameras that is often misunderstood or simply ignored by many newer GoPro users. We’ll help you understand everything you need to know so you can decide if GoPro Protune is worth it for you.
What is Protune on GoPro?
Protune gives you more control over your GoPro photo and video settings. If you’ve ever played with a DSLR or mirrorless camera, it’s kind of like switching the camera into manual mode. GoPro Protune allows you to modify all kinds of settings like the shutter speed, exposure compensation, white balance, color profiles, ISO and sharpness, to name a few. By default, Protune is turned off and is accessible from either the touch screen on newer models or the GoPro camera smartphone app.
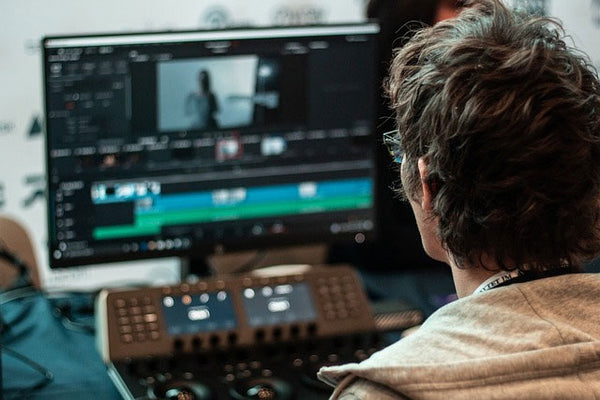
Who is Protune for? Protune is for GoPro users who want a specific look in their photos or higher quality image and video. Anyone who uses Protune should be willing to spend time editing after shooting or have a plan to use a professional Video Editing Service like Spivo's to save time and energy. As Protune gives you the ability to fine-tune every camera setting, it’s a good idea to mess around with Protune before relying on it for a particular trip or shot.
Should I use Protune?
It is absolutely not mandatory to use Protune. If you’re a beginner or have recently purchased your first GoPro camera, you’ll probably find the default settings to be pretty freaking good. Meanwhile, if you tend to be picky with your content, or are simply curious about what’s possible with GoPro Protune, keep reading as we’re going to cover every single setting in detail.
One important question to ask yourself before turning on Protune:
Am I going to be editing the photos and videos after shooting? Or is there a specific look I want in my photos?
If you answered “yes”, turn Protune on by all means because you’re comfortable and willing to spend time editing the colors of your photos and videos in either Adobe Premiere Pro, Final Cut Pro, Adobe Lightroom, etc…
If you answered “no”, we’d recommend sticking with the auto settings as your content will be ready to share directly from the camera with little editing required. Keep in mind, you can still edit your photos on Instagram (see our guide) or Lightroom to make smaller changes when shooting with Protune off.
Which GoPro cameras have Protune?
- MAX
- Hero 8 Black
- Hero 7 Black
- Hero 6 Black
- Hero 5 Black
- Hero 5 Session
- Hero 4
- Hero Session + Hero Session
- Hero 3+ Black Edition
- Hero 3: Black and SilverEdition
Depending on your model of GoPro, you might have some limitations when using Protune. Generally, Protune is only available on the higher-end GoPro models most commonly referred to as “Black”. On the newer models, you’ll be able to use Protune for either photos or videos, whereas some of the older cameras are limited only to shooting videos with Protune. Moreover, on the newer Hero 7 Black and Hero 8 Black, you can even use a slightly more limited version of Protune for timelapse video and timelapse photo.
What are all the GoPro Protune Settings?
For the remainder of this blog, we’d recommend grabbing your GoPro to follow along and test each mode for yourself. Go ahead and grab it, we’ll wait :)
Shutter speed setting

Shutter speed is the amount of time in seconds that the shutter stays open exposing the camera sensor to light. The most common shutter speeds as displayed as fractions of a second for example 1/125, or 1/500. The longer the shutter stays open, the more light and movement the GoPro sensor will receive.
For Protune photos, the ability to shoot at a specific shutter speed is most useful for low light scenarios. Faster shutter speeds (for example: 1/4000) are generally used for well light or action shots, where slow shutter speeds (1-30 seconds) can be used to capture specific lightning effects like light trails, motion blurs or starlight. Generally, the darker the environment, the longer you’ll want to keep the shutter open. For any long exposure shot, we always recommend shooting with a tripod as the camera needs to be as stable as possible to avoid blurring and graininess. For longer shutter speed options you'll have to switch to night mode, and then go to Protune Settings.
For Protune video, the shutter speed is based off the video frame rate (FPS) and the available shutter speeds are multiples of the frame rate. For example, if you’re shooting 1440P at 60 FPS which is our recommended shooting mode on the Spivo 360, you’ll see shutter speed options of 1/120 or 1/240 (multiples of 60) on your GoPro. There’s a rule in videography called the 180-degree shutter angle rule which stipulates your shutter speed should always be double your frame rate to ensure your video contains natural movement. If you select a shutter speed that is too low, you’ll get blurred movement while a shutter speed that is too high will look like everything was shot in slow motion. Unless you have a very specific reason you want to change the shutter speed, it’s a good idea to leave it on auto for most applications.
One last note about Protune video: it does enable recording at a higher bitrate which leads to higher quality footage, although it will take up more room on your memory card.
EV Comp Setting (Exposure Compensation)

The EV Comp setting gives you the ability to manually set the exposure which is the overall brightness of the photo. With Protune, you can adjust the exposure in 0.5 steps from -2.0 to +2.0, where a photo or video with ideal lighting will have an exposure of 0. If you want a brighter photo (e.g. shooting at night), you can consider raising it by one stop from +0.5 to +2.0. If you want to darken your shot (e.g. shooting in harsh direct sunlight) bring the exposure down between -0.5 to -2.0.
There are a few limitations when adjusting the exposure.
- Exposure compensation will only adjust the brightness up within the ISO limits (more on ISO below) you’ve set. As such, there won’t be any effect if you’re trying to increase the EV Comp past the ISO limit in a low light setting.
- Specifically for photos: it’s not possible to change the exposure when shooting with SuperPhoto (HDR) on. With SuperPhoto on, it will display “N/A” below the EV Comp heading. Turn off Superphoto to adjust the EV Comp.
Bonus content: 4 GoPro settings you should know
WB Setting (White Balance)

White Balance (WB) is a setting used to accurately capture natural colors.
Generally, you want the overall color tone looking natural rather than tinted and to have objects that are white in person be white in your photo. White Balance is commonly written in Kelvin (K) color temperature units (e.g. 3000K) and is adjustable from 2300K to 6500K using GoPro Protune. Dark environments such as a candlelit room will be around 2300K, while bright sunlight can be around 5000K and up. The correct WB should take into considering the color temperature of the light source. For example, sunny shots have a different temperature than a cloudy one, so we’ll provide some examples of which WB temperature to use for various shots.
6500K: (daylight or cool lighting) for shooting outside with overcast conditions or indoors with a lot of white (fluorescent) light.
5000-5500k: (slightly cool light) normal daylight, snowy conditions or for shooting outside with a clear sky.
2300 - 3000k: (warm light) sunrise, sunset, a fire, and incandescent indoor light.
Native: this mode captures a truer (less processed) image/video with the least amount of color correction. Use this only if you definitely plan on editing.
Since WB can vary quite a bit depending on the lighting, it’s best to use it when your light source is very constant. If you set the WB incorrectly, you’ll end up with a strong unrealistic looking color cast. If the WB is too high, the shot will come out with orange tint meanwhile, a too low number will come out bluish. If you are shooting with multiple different cameras or GoPro’s, it can be a good idea to set the WB to the same temperature across all cameras so everything looks the same. This tactic often used by wedding photographers, even though most don’t shoot with GoPros.
Don’t forget to set the WB back to Auto or Native when you’re done shooting!
ISO Setting

ISO is a setting that sets the GoPro sensor sensitivity to light. On GoPro cameras, the sensitivity ranges from 100 (low sensitivity) to 6400 (high sensitivity). Generally, you want to set the ISO to the lowest possible number while keeping the shot properly exposed. Higher ISO numbers such as 3200 or 6400 should only really be used in low light (night time settings) as these shots will have more graininess/noise.
On the Hero 7 Black, you can set a min and max ISO, whereas former versions like the Hero 5 Black have the option to set only a max ISO and your GoPro will automatically adjust the ISO up to that number. If you know you’re going to be shooting in a specific scenario like in direct sunlight, it can make sense to lock the ISO to a specific number or range such as 100 (min) and 1000 (max). If you’re reading this, you know that GoPro’s aren’t exactly known for their low light performance. As such, for capturing northern lights, starlight, or to shoot a thunderstorm at night, it makes sense to lock the ISO at 3200 or 6400.
Sharpness Setting:

Sharpness in photography is a term used to describe the overall clarity of an image in terms of both contrast and focus. There are three settings for sharpness on your GoPro: High, medium, and low. The default setting is High which helps your GoPro shots look lifelike, with lots of contrast, detail, and texture. If you plan on editing the photos or videos, you can consider bringing the sharpness down to medium or low. Keep in mind, it’s always easier to add sharpness in when video editing than to reduce it.
Color Setting:

The color setting on GoPro Protune is one of the simplest as there are only two options: GoPro (color) and Flat. The default setting is GoPro color which will color-correct the image profile in camera. Meanwhile, Flat offers a more neutral color profile which is popular amongst cinematographers. The Flat color profile captures more details in the shadows and tames down the highlights (bright spots), which is great for shooting on a cloudy day or on a sunny day where there are lots shadows. Without editing, photos or videos shot with the Flat color profile will appear much less impressive, although they will offer you more control over all image aspects such as contrast and saturation in post-production.
Bonus content: 10 Best Free and Paid Video Editing Apps for GoPro adventurers
With the normal GoPro color profile, the shadows tend to be darker and the highlights are brighter which can make it a harder to balance when editing. The colors tend to be more punchy and the shots have with higher contrast. GoPro color saturates the image quite a bit more than Flat and can even make some scenes (especially the sky) look a little fake at times. For quick shots that are ready to be posted online with little editing, GoPro color is a great option. Meanwhile, if you want to have the added flexibility in post-production, or you’re shooting with multiple cameras and plan to match up the footage, it’s a good idea to shoot with the Flat profile.
Raw Audio Setting (for video)
Raw Audio is the GoPro Protune setting that we find makes the least amount of difference. There are three different audio modes:
Low (applies minimal audio correction)
Medium (applies to process based on the Manual Audio Control setting (wind and/or stereo).
High (applies full audio processing including wind and/or stereo and automatic gain)
We've tested all three of the RAW audio modes and we can't really tell a difference between them after listening to the three side by side. Give it a try if you're curious about what it does, but don't expect any dramatic improvements in audio quality.
Mics Setting (Microphone Setting)
The Mics setting is newer available on newer cameras only and allows you to set the audio in one of three modes.
Auto: the default mode which switches between stereo and wind automatically.
Stereo: use Stereo when the wind is not a factor. This mode will force your GoPro to utilize both microphones to record audio. Filming a vlog in a backyard or quiet place could make for a good opportunity to use this mode.
Wind: use Wind on windy days or if your GoPro is mounted on a moving vehicle. If you’re going for a motorcycle or boat ride, use this mode to prioritize wind reduction in the video.
GoPro’s aren’t really known for their audio quality and we’ve never bothered to take it off of the auto setting. If you have, let us know in comments what you filmed!
Reset Settings
Finally, tapping reset will restore Protune to its original settings. On the newer touch screen models (Hero 5/6/7/8) you’ll be prompted on an extra menu to confirm you want to reset to the default Protune mode.
That's a wrap
Nice work! In this blog, we’ve covered everything you need to know about GoPro Protune. With your newfound knowledge, are you going to use Protune on your next adventure? Let us know in the comments below or on Instagram.
Got tons of GoPro footage sitting around?

The sad reality is that most GoPro most footage never gets used. Life's busy, most people don't have the time or ability to put together a video they'll be super stoked on. If this sounds like you, consider using our Video Editing Service to get a professionally made video of your GoPro adventure at an affordable price.
If you found this blog helpful, please subscribe to The Adventurist weekly newsletter where we share curated photography and travel tips to help you capture better.


13 comments
Mar 12, 2020 • Posted by Pascal
“Keep in mind, it’s always easier to add sharpness in when video editing than to reduce it.”
Interesting. Why is that? I would have thought that reducing sharpness means losing information and should be easier to acquire.
Mar 12, 2020 • Posted by Spivo
The main idea here is that if you play with the sharpness setting in-camera, you can’t undo it. The raw file was affected. However, if you adjust the sharpness in your video editing software you keep the original file intact, and thus all the information.
It’s also very hard to smoothen an already sharpened video and have it look natural.
Apr 15, 2020 • Posted by Alfredo Brock
Thanks for this article. This features will help me a lot. This is great.
Apr 15, 2020 • Posted by Spivo
You’re welcome, Alfredo! Be sure to subscribe to our newsletter for more tips below.
Aug 12, 2020 • Posted by thomas
Did you use a ND filter for the motionblur picture with the train? everytime i try using the nightmode photo mode with max iso set to 100, i get super overexposed pictures.
Aug 12, 2020 • Posted by Spivo
Hey Thomas,
Great question! Since we were in a train station the lighting was low enough that we did not need to use an ND filter. The train was also moving very fast which allowed us to use faster shutter speeds and still get some motion blur.
Make sure to try faster shutter speeds if it’s still too bright, it doesn’t need much to get motion blur.
Pro Tip: If you’re outside and it’s sunny you will need to use an ND filter. If you don’t have one sun glasses work really well! – Andre
Aug 12, 2020 • Posted by thomas
Hey! Thanks for the fast response! i tried in semi low light. but all i got was basically a white screen. I tried with it with 2 seconds and max iso 100, since this is the fastest shutter speed in nightmode on the hero7 black.
What were your settings? The picture looks really cool :)
Thanks again!
Aug 12, 2020 • Posted by Spivo
Hey Thomas, my settings for the train photo were: Shuter speed 1/4s, ISO 100, Nightscene, Exposure bias 0.5. It took me over 10 photos to get it right haha. – Andre
Aug 12, 2020 • Posted by thomas
I see, so you have been shooting it on a hero8 i guess. there is no shutter speed 1/4s with nightmode on the hero7 unfortunately!
Aug 12, 2020 • Posted by Spivo
Hey Thomas,
No it was on the Hero7! Maybe it wasn’t night mode, maybe it was just in manual mode with those settings. – Andre
Aug 12, 2020 • Posted by thomas
Since it’s getting dark here i have been continuously testing and it might be that iso was max100 but shutter speed auto, since it also says on the gopro website that in auto shutter speed, the camera itself can adjust the shutter speed from 1/4096th of a second, up to 2 seconds. 1/4s would be possible there, which i otherwise cannot find in any mode or setting :)
Aug 12, 2020 • Posted by Spivo
Hey Thomas, yes that’s it! And then you play with exposure compensation to get the shutter speed you want.
Aug 12, 2020 • Posted by thomas
Perfect! Thanks for the advice and for the quick responses!
Leave a comment